
Ever since I was a kid I have slept with dreamcatchers hanging from my bed. I love the idea that good dreams pass through the holes and slither down the feathers into my dreaming mind. Recently, at the Free People store where I work, my girl Casi made dreamcatchers to give to our customers. It inspired me to do a DIY dreamcatcher post!

Supplies Needed:
-Craft hoop or twig
-Thin string thats is at least 12 ft
-Ribbon (if desired)
-Beads, feathers or other adornments


Once you have the loop tighten it against the hoop. (So many oops!)


Then bring the string around and over the hoop...

...making sure the string is under your original move with the string.

Then tighten!


Keep looping around previous loops!


By the time you are done with the second round of loops it should look like this:

Step 6: Keep looping around your previous loops until you get all the way to the center.

By the end it should look something like this:

Step 7: Put a bead on the string and tie it off using one of your loops.


Supplies Needed:
-Craft hoop or twig
-Thin string thats is at least 12 ft
-Ribbon (if desired)
-Beads, feathers or other adornments
Step 1: If you are using a twig: Bend the twig into a circle then, where the ends connect, wrap string around and tie off.


If you have a craft hoop: Spice it up a little by wrapping ribbon or string around the hoop. Once you have wrapped the whole hoop tie it off!


If you have a twig feel free to wrap ribbon around it!
Step 2: Using the string you want to weave with, tie a knot at the bottom of the hoop.

Step 3: Let the weaving begin! Take your string and put it under the hoop.

Then bring the string around and over the hoop. Note how the string goes under your original move with the string, creating a loop.


Step 4: Repeat these loops all around the hoop. So once again: take the string and place it under the hoop.

Then bring the string around and over the hoop...

...making sure the string is under your original move with the string.

Then tighten!

Make more loops around your hoop if you want a more intricate weave and less loops for a less intricate weave. You should end up with something that looks like this:

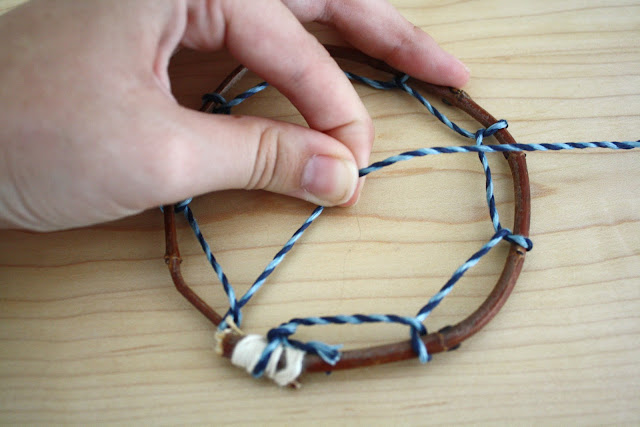
Step 5: Repeat your loop pattern on your previous loops. It sounds confusing but the pictures below should clarify!


Keep looping around previous loops!


By the time you are done with the second round of loops it should look like this:

Step 6: Keep looping around your previous loops until you get all the way to the center.

By the end it should look something like this:

Step 7: Put a bead on the string and tie it off using one of your loops.


Step 8: Decorate! Tie some feathers, beads or whatever you want to the bottom! After that you are ready to hang it wherever you may please!

No comments:
Post a Comment